LazyVGrid and LazyHGrid in SwiftUI (Part 1/3)
- add-custom-library-swiftui
- custom-buttons-in-swiftui
- custom-color-in-swiftui
- custom-list-in-swiftui
- custom-textfield-in-swiftui
- detect-os-in-swiftui
- detect-the-current-theme-in-swiftui
- lazyvgrid-and-lazyhgrid-in-swiftui-part-1
- lazyvgrid-and-lazyhgrid-in-swiftui-part-2-3
- lineargradient-swiftui
- the-happy-programmer
LazyVGrid and LazyHGrid in SwiftUI are the new Views in the latest SwiftUI 2.0 as you might imagine they can only work on iOS 14. SwiftUI 2.0 has solved the problem on Grids by creating LazyVGrid() and LazyHGrid() the lazy part indicates that the items are being loaded only they are about to be shown on the screen, therefore only a part of the set is being loaded in the memory thus making the View to initiate faster and feel lighter. In this post I will be showing you how to implement LazyVGrid() and create a stunning design in your next SwiftUI project.
Result
https://videopress.com/v/2GjqgBhn?resizeToParent=true&cover=true&autoPlay=true&loop=true&muted=true&persistVolume=false&preloadContent=metadata
The completed example using LazyVGrid and LazyHGrid in SwiftUI
Data
for this example I will be using data and images that that are available to clone on GitHub.
struct Drinks: Identifiable {
    var id = UUID()
    var name: String
    var image: String
    var description: String
    var type: String
}
The UUID() and Identifiable is there to give a unique ID to every item in the list.
Insert Data
Next Step is to insert the data and it will look something like this.
Drinks(name: "A1", image: "2x8thr1504816928", description: "Pour all ingredients into a cocktail shaker, mix and serve over ice into a chilled glass.", type: "Alcoholic")
Get the whole Data Set Here!!!!
After you downloaded the Assets and the data set, we can move on to create the LazyVGrid().
LazyVGrid Explained
LazyVGrid() takes a couple of different attributes.
LazyVGrid(columns : columns , alignment: .center)
Columns in LazyVGrid
:columns represent how many columns you want in your Grid. Columns is being applied by [GridItem]
[GridItem] take a couple of attributes such as .adaptive, .fixed, and .flexible
[GridItem(GridItem.Size, spacing: CGFloat?, alignment: Alignment?)]
GridItem.Size is the part where if going to define the expansion of the column. the options are
[GridItem(.adaptive(minimum: CGFloat, maximum: CGFloat)]
As the word it self explains it.adaptive will take as much space as is the maximum insertion and as less space as the minimum.
[GridItem(.fixed(CGFloat))]
.fixed will take a certain given amount of space.
[GridItem(.flexible())]
.flexible will take every available space, unless we specify the minimum and maximum the difference between .flexible and .adaptive is that .flexible is not mandatory to add minimum and maximum
Let's create something using LazyVGrid
I will create a grid the user will be able to change the type of the grid real time.
Create the card for single column
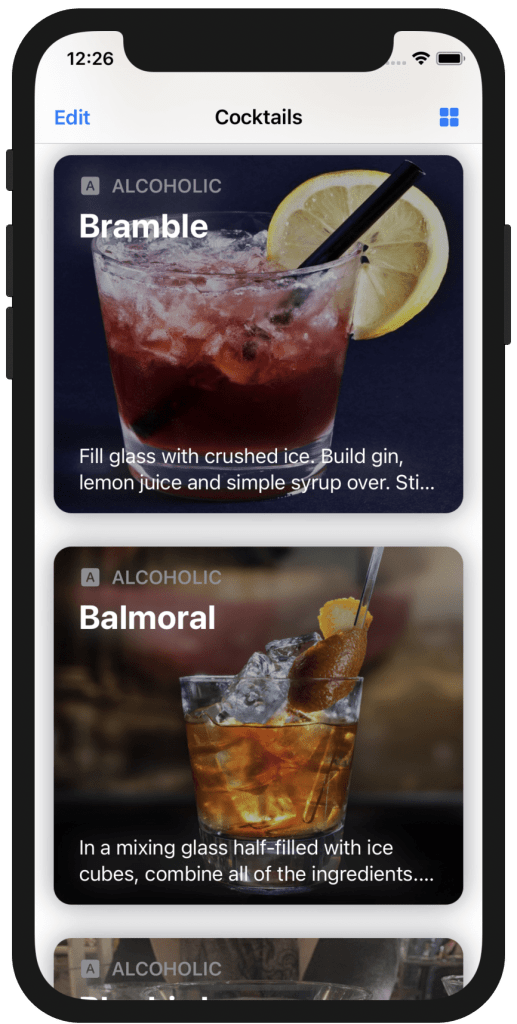
LazyVGrid() with one .flexible() column
struct singleColumn: View {
    var gridOption: Bool
    var m: Drinks
    var body: some View {
        ZStack(alignment: .topLeading) {
            Image(m.image)
            .resizable()
            .frame(height: gridOption ? 100 : 300)
                .overlay(Color.black.opacity(0.3))
                .cornerRadius(15)
            VStack(alignment: .leading, spacing: 7) {
                HStack {
                    Image(systemName: "a.square.fill").foregroundColor(Color.gray)
                    Text(m.type)
                        .font(.callout)
                        .fontWeight(.semibold)
                        .foregroundColor(Color.gray)
                        .textCase(.uppercase)
                }
                Text(m.name).font(.title)
                    .foregroundColor(Color.white)
                    .fontWeight(.bold)
                Spacer()
                Text(m.description)
                    .lineLimit(2)
                    .foregroundColor(Color.white)
            }.padding()
            .padding(.horizontal, 5)
        }
        .padding(.horizontal,0)
        .padding(.vertical, 10)
        .shadow(color: Color.gray, radius: 12 )
    }
}
Create the card for double column
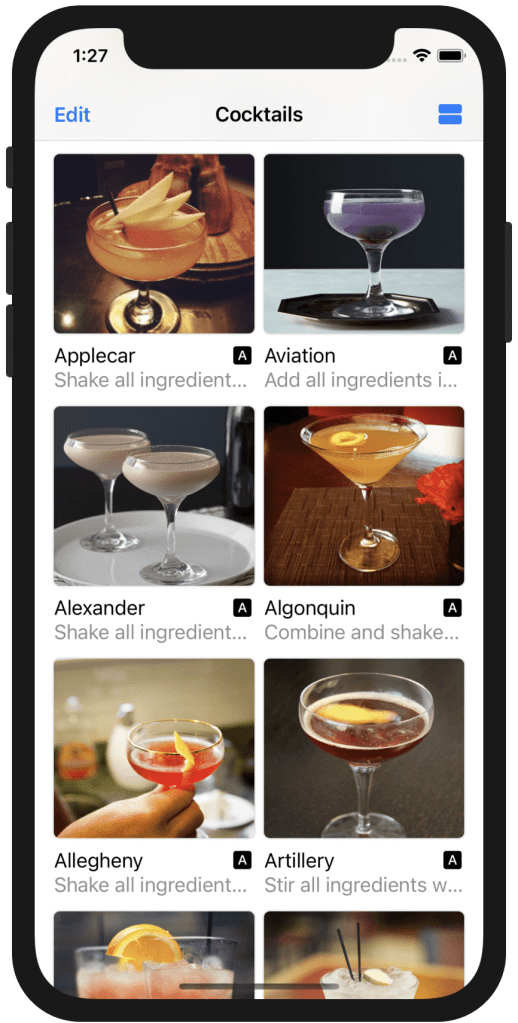
LazyVGrid() with double .flexible() columns
struct doubleColumn: View {
    var gridOption: Bool
    var m: Drinks
    var body: some View {
        VStack {
            Image(m.image)
                .resizable()
                .frame(height: 150)
                .cornerRadius(5)
                .shadow(radius: 1)
            VStack(alignment: .leading) {
                HStack {
                    Text(m.name)
                    Spacer()
                    Image(systemName: "a.square.fill")
                }
                Text(m.description).lineLimit(1)
                    .foregroundColor(Color.gray)
            }
        }

    }
}
Create the Button for changing the grid
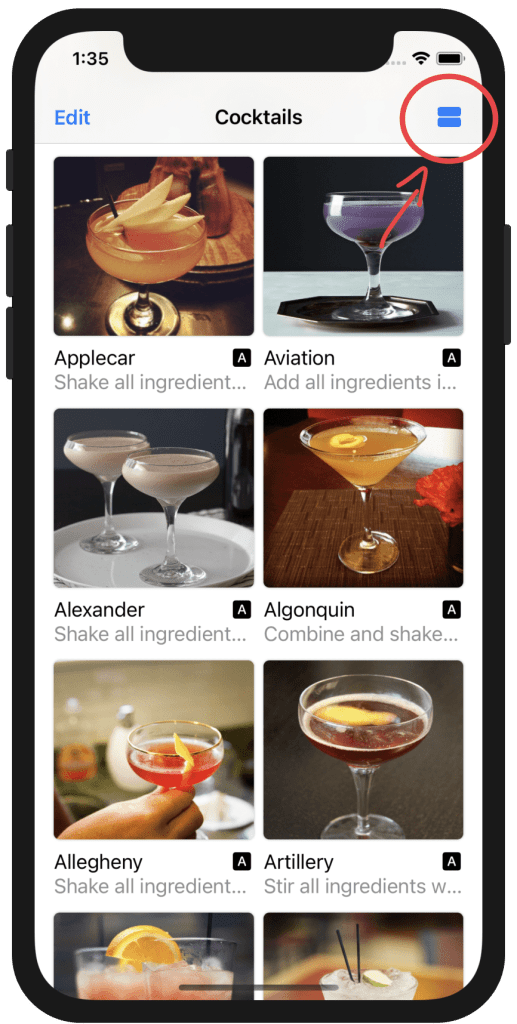
Swtch Button to switch between grids
we are going to need a @State Boolean to indicate whether is single or double column.
@State var gridOption = false
.navigationBarItems(leading: EditButton(), trailing:
                Button(action: {
                    gridOption.toggle()
                }) {
                    Image(systemName: gridOption ? "rectangle.grid.1x2.fill" : "square.grid.2x2.fill")
                }
            )
Combine everything together
using the above views we created and iterating through the data.
struct Drinks: Identifiable {
    var id = UUID()
    var name: String
    var image: String
    var description: String
    var type: String
}
let messages = [...] // download the data from the link above
struct ContentView: View {

    let columns = [GridItem(.flexible()),GridItem(.flexible())]
    let column = [GridItem(.flexible())]

    @State var gridOption = false
    var body: some View {
        NavigationView {
            ScrollView {
                LazyVGrid(columns: gridOption ? columns : column , alignment: .center) {
                    ForEach(messages) { m in
                        if gridOption {
                           // find this view above
                            doubleColumn(gridOption: gridOption, m: m)
                        } else {
                           // find this view above
                            singleColumn(gridOption: gridOption, m: m)
                        }
                    }
                }.padding(.horizontal)
            }.navigationTitle("Cocktails")

            .navigationBarItems(leading: EditButton(), trailing:
                Button(action: {
                    gridOption.toggle()
                }) {
                    Image(systemName: gridOption ? "rectangle.grid.1x2.fill" : "square.grid.2x2.fill")
                }
            )
        }
    }
}
Result
https://videopress.com/v/MoD2hyyD?resizeToParent=true&cover=true&autoPlay=true&loop=true&muted=true&persistVolume=false&preloadContent=metadata
The whole code combined using LazyVGrid()
Stay Tuned for the second Part
on the second part of this series I will be expanding this cocktail app using LazyHGrid and LazyVGrid in SwiftUI.
you can find the code at GitHub.
Pages
Home
Courses
Blog
About
Tags
Swift
SwiftUI
Announcements
NuxtJS
Categories
Announcements
SwiftUI
Follow us
subscribe to our newsletter
Copyright © 2023 Inc. All rights reserved.