Add a Custom Library SwiftUI
- add-custom-library-swiftui
- custom-buttons-in-swiftui
- custom-color-in-swiftui
- custom-list-in-swiftui
- custom-textfield-in-swiftui
- detect-os-in-swiftui
- detect-the-current-theme-in-swiftui
- lazyvgrid-and-lazyhgrid-in-swiftui-part-1
- lazyvgrid-and-lazyhgrid-in-swiftui-part-2-3
- lineargradient-swiftui
- the-happy-programmer
SwiftUI 2.0 has allowed us to be able to add our own custom items in the library.In this post I will cover how to add custom Library Items in SwiftUI. I will also cover modifiers for Images where you can use the same logic to make modifiers for any View.
If you want to make your own Library on SwiftUI 2, so can you reuse it every time you need.
We will create an extension as well as a code snippet, which means. We can add in the View Library both views and styles.
Why do this?
- Not repeating yourself as a programmer is crucial.
- The code will look clean and neat.
- your code is accessible and organised
when we are done you will see you own Control in Library
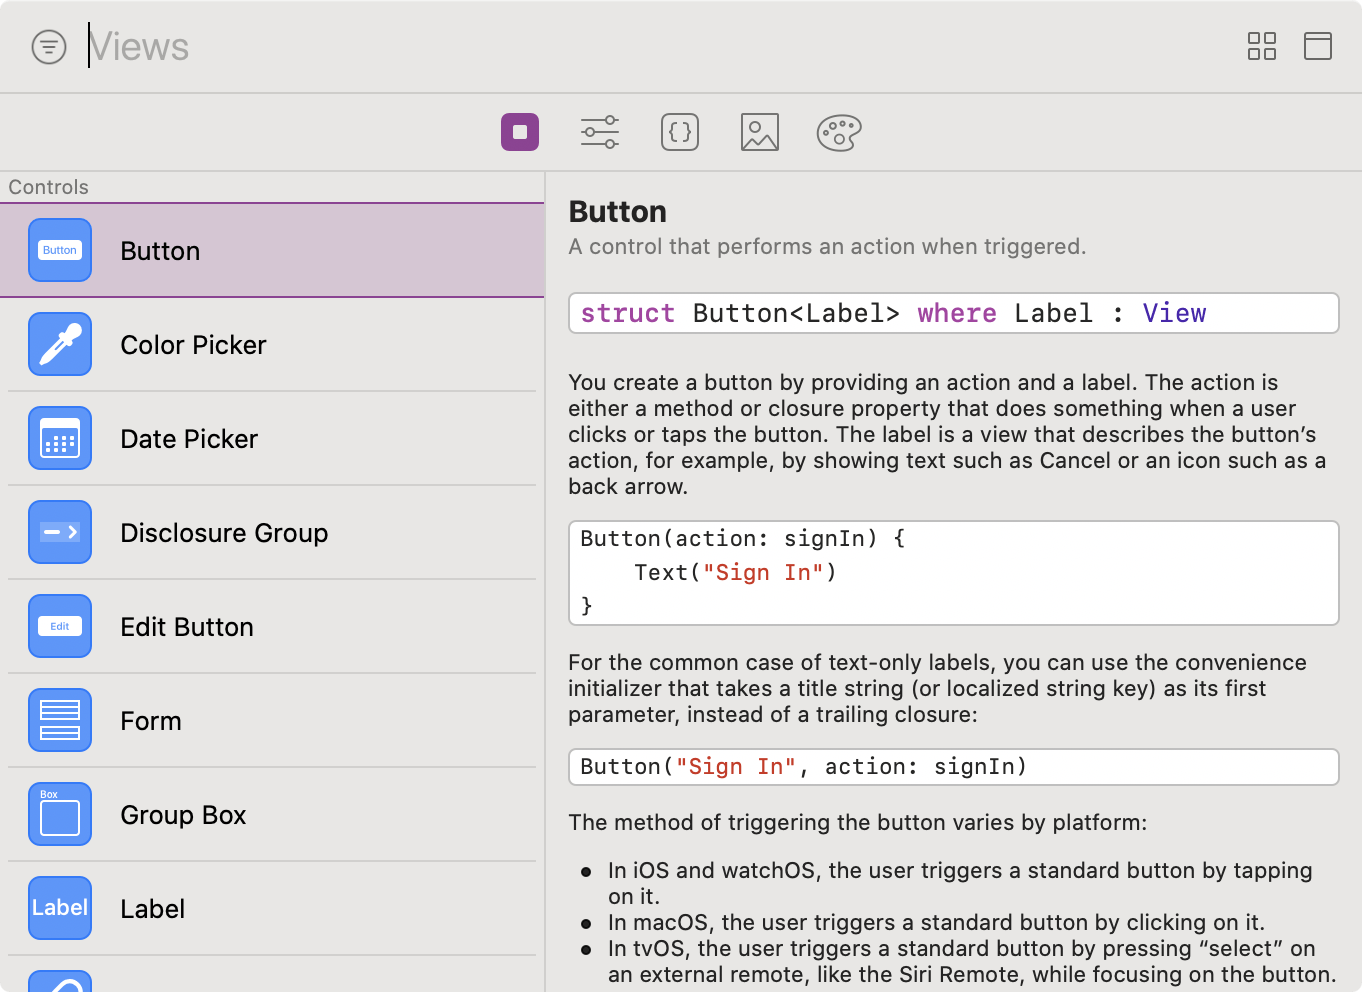
Image Extension
we can create any control we want, in this particular example I will be making a reusable image style, which it will give a particular shape to any image we want, and we can give decide the height and the width.
extension Image {
    func imgAvatar(width: CGFloat, height: CGFloat) -> some View {
        self
            .resizable()
            .aspectRatio(contentMode: .fill)
            .frame(width: width, height: width)
            .clipShape(Circle())

    }
}
The above code will create a control where you can apply to any Image Views and give a specified width and height.
How to add a modifier in the Library
struct LibraryContent: LibraryContentProvider {
    @LibraryContentBuilder
    func modifiers(base: Image) -> [LibraryItem] {
        LibraryItem(
            base.imgAvatar(width: 50, height: 50),
            title: "Avatar Circular Image",
            category: .control
        )
    }
}
Note, category: .control represents the category of the library item
Now we can see the item we created in the library

Add a View in the Library
Let's make a View by using the extension we created and add that in the library too.
struct ViewLibrary: LibraryContentProvider {
    @LibraryContentBuilder
    var views: [LibraryItem] {
        LibraryItem(
            ChatRow(photo: "user1", name: "James", message: "Hello", time: "20:20"),
            title: "Chat Row",
            category: .control
        )
    }
}
As you can see, you this time is we are making a View and not a modifier.
struct ChatRow: View {

    var photo: String
    var name: String
    var message: String
    var time: String

    var body: some View {
        VStack(alignment: .leading) {
            HStack {
                Image(photo).imgAvatar(width: 50, height: 50)
                VStack(alignment: .leading) {
                    Text(name)
                        .font(.headline)
                    Text(message)
                        .font(.subheadline)
                        .foregroundColor(Color.gray)
                        .lineLimit(1)
                }
                Spacer()
                Text(time)
                    .font(.caption)
                    .foregroundColor(Color.gray)

            }
        }.padding(.horizontal, 10)
    }
}
By using the modifier we already created .imgAvatar(width: 50, height: 50). We made a view, and we added this view in our library.

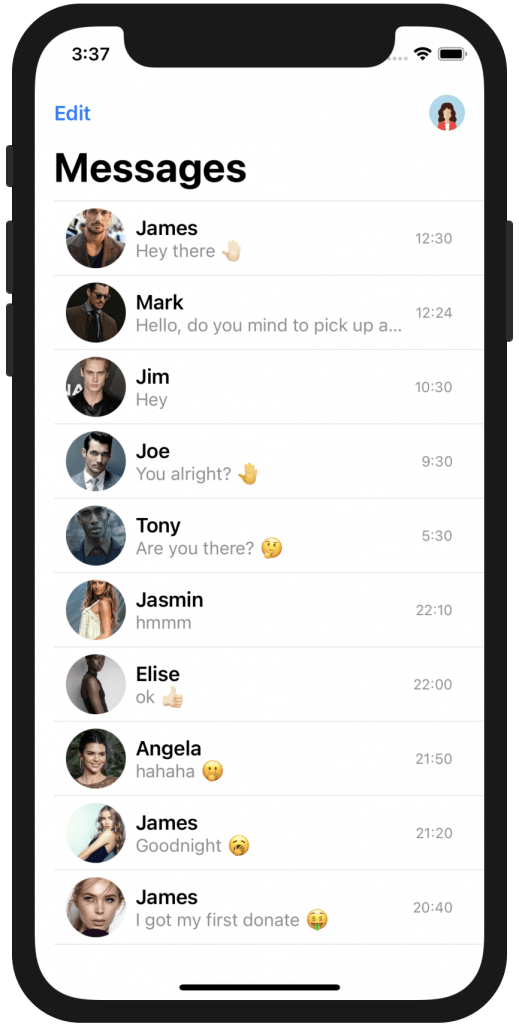
Let's use the above library items to make a clean looking code base for a messaging list. That was it can be seen how only by adding two items in our library we can create a very simple looking view.
First, we need the data
struct Messages: Identifiable {
    let id = UUID()
    let name: String
    let photo: String
    let message: String
    let time: String
}
let messages = [
    Messages( name: "James" , photo: "user1" , message: "Hey there 🤚🏻", time: "12:30"),
    Messages( name: "Mark" , photo: "user2" , message: "Hello, do you mind to pick up a coffe for me?", time: "12:24"),
    Messages( name: "Jim" , photo: "user3" , message: "Hey ", time: "10:30"),
    Messages( name: "Joe" , photo: "user4" , message: "You alright? 🤚", time: "9:30"),
    Messages( name: "Tony" , photo: "user5" , message: "Are you there? 🤔", time: "5:30"),
    Messages( name: "Jasmin" , photo: "user6" , message: "hmmm ", time: "22:10"),
    Messages( name: "Elise" , photo: "user7" , message: "ok 👍🏻", time: "22:00"),
    Messages( name: "Angela" , photo: "user8" , message: "hahaha 🤭", time: "21:50"),
    Messages( name: "James" , photo: "user9" , message: "Goodnight 🥱", time: "21:20"),
    Messages( name: "James" , photo: "user10" , message: "I got my first donate 🤑", time: "20:40"),
]
Combine Everything Together
struct ContentView: View {
    var body: some View {
        NavigationView {
            List(messages) { user in
                ChatRow(photo: user.photo,name: user.name,message: user.message, time: user.time)

            }.listStyle(PlainListStyle())
            .navigationBarTitle("Messages")
            .navigationBarItems(leading:EditButton(), trailing: Image("user").imgAvatar(width: 30, height: 30))


        }
    }
}
Result
You can Find the code on GitHub
Pages
Home
Courses
Blog
About
Tags
Swift
SwiftUI
Announcements
NuxtJS
Categories
Announcements
SwiftUI
Follow us
subscribe to our newsletter
Copyright © 2023 Inc. All rights reserved.